Understanding the Signs of Hidden Leaks
Unexplained Increase in Water Bills: If your water usage habits haven’t changed but your bill is climbing, it could signal a leak. Compare current bills to those from the same period in previous years to determine if there’s a significant increase.
Musty Smells or Persistent Dampness: A continuous musty odor or damp spots that don’t dry up can indicate hidden moisture inside your walls or under floors. These signs are particularly important to monitor in areas like basements and bathrooms, where leaks can go unnoticed for longer.
Sounds of Running Water When Taps are Off: Hearing water when no appliance or tap is running could point to water flowing through damaged pipes. This often subtle noise can be a crucial hint that there’s a leak somewhere in your home.
Cracks in Walls or Flooring: Over time, leaks can cause structural damage manifesting as cracks in your walls or floor. These signs should prompt an immediate investigation, as they indicate not only potential plumbing issues but also structural risks to your home.
Visual Inspection Methods
Tips on Where to Look for Visible Signs of Leaks in the Home: Start your inspection in areas that are most prone to water leakage. Check under all sinks, inspect the bases of toilets, and around any water-using appliances like dishwashers and washing machines. Don’t forget to look at outdoor connections and spigots as well.
Common Problem Areas:
Under Sinks: These are prime spots for leaks due to frequent use and connections to water lines. Look for puddles or signs of corrosion on the pipes.
Around Toilets: Check for water on the floor around the toilet base, which can indicate a failing seal or a leak from the supply line.
Near Water Heaters: Look for pooling water or dampness around your water heater. Any signs of water could suggest a leak in the tank or connecting pipes.
How to Spot Water Stains on Ceilings and Walls: Water stains or discoloration on ceilings and walls are often signs of hidden leaks. Check the ceilings beneath bathrooms and kitchens for yellowish or brownish stains. Peeling paint or bulging wallpaper can also indicate moisture issues behind your walls. Use a flashlight to help spot these signs in darker areas or during nighttime to ensure you don’t miss subtle signs of moisture.
DIY Techniques for Leak Detection
- Water Meter Test: To perform a water meter test, first ensure that all water inside and outside your home is turned off. Record the reading on your water meter, then wait for 1-2 hours without using any water. After this period, check the meter again; if the reading has changed, it likely indicates a leak. This method is particularly effective because it catches not only obvious leaks but also those hidden from view, such as underground or in walls.
- Dye Tests for Toilets to Check for Internal LeaksToilet leaks can be silent yet wasteful. To check for leaks in your toilet tank, use a dye test. Simply add a few drops of food coloring or a dye tablet to the tank water and wait about 30 minutes without flushing. If you see the color seeping into the bowl, this indicates a leak from the tank to the bowl, usually due to a faulty flapper or valve seal. This test is quick, easy, and a must-do for routine home maintenance.
- Using Food Coloring to Detect Leaks in Visible Plumbing JointsFor exposed pipes such as those under sinks or along the wall, you can use food coloring to identify leaks. Dry the area around the joint thoroughly, then apply a small amount of brightly colored food coloring to the joint. Watch for a few minutes to see if the coloring spreads or drips, which indicates a leak. This method allows you to pinpoint the exact location of a leak, making it easier to address the problem directly or explain the issue to a professional plumber.
Fixing Detected Leaks
Step-by-Step Advice on Addressing Minor Leaks:
Identify the Leak Source: Confirm the exact source of the leak. This could be at joints, fittings, or within the faucet.
Turn Off the Water Supply: Before attempting any repair, shut off the water supply to the affected area to prevent further damage and facilitate a dry work environment.
Prepare the Right Tools: Gather necessary tools such as wrenches, plumber’s tape, or replacement washers. Make sure you have the correct size and type for your specific plumbing.
Repair the Leak: For leaky joints, tighten the fittings with a wrench. If the leak is from a worn-out washer or seal, replace it with a new one. Apply plumber’s tape to the threads for a tighter seal.
Test Your Repair: Turn the water back on and check if the leak persists. If the problem continues, you might need a different approach or new parts.
When to Call a Professional Plumber in Riverside for Leak Repair:
- The leak is in a hard-to-reach location or involves main water lines.
- Multiple leaks or recurrent leak problems are observed.
- There’s significant water damage or the repair requires replacing large sections of pipe. Professional plumbers in Riversidehave the tools, expertise, and experience to handle complex issues and ensure compliance with local plumbing codes.
Temporary Versus Permanent Solutions for Different Types of Leaks:
Temporary Solutions: Useful for immediate response to prevent damage until a permanent fix can be made. This includes using plumber’s putty or tape to seal leaks temporarily.
Permanent Solutions: Involves replacing faulty parts, such as old piping, worn washers, or broken seals. Permanent repairs ensure the longevity and reliability of your plumbing system.
Water Damage and Mold Prevention
Tips on Mitigating Water Damage Once a Leak is detected:
Act Quickly: As soon as you detect a leak, act fast to minimize water exposure. The longer water sits, the greater the potential damage.
Remove Standing Water: Use towels, mops, or a wet/dry vacuum to clean up any standing water. For large amounts, consider renting a pump to expedite the process.
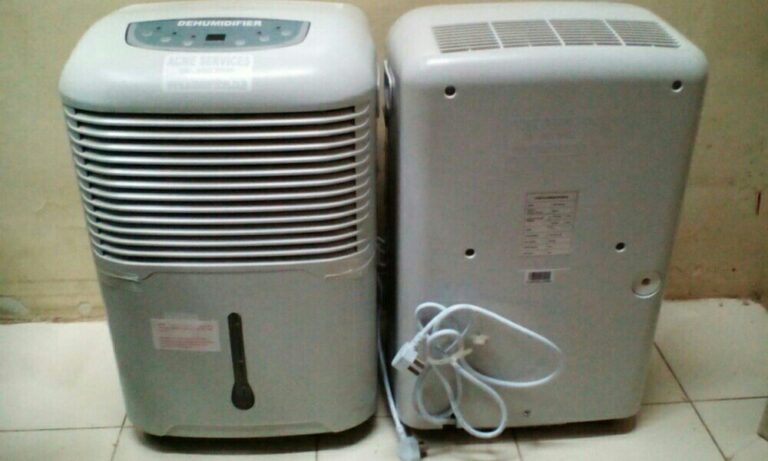
Dry Out the Area: Open windows, use fans, or dehumidifiers to circulate air and dry out affected areas. Proper ventilation is vital in preventing water from seeping into flooring, walls, and furniture.
Protect Valuables: Move furniture, electronics, and other valuables away from the affected area to prevent further damage.
Inspect for Structural Damage: Look for warping, discoloration, or deterioration in floors and walls. These signs might indicate more severe issues needing professional assessment.
Preventing Mold Growth from Persistent Dampness:
Control Humidity Levels: Maintain indoor humidity below 60% using dehumidifiers or air conditioners. Regular checks with a hygrometer can help monitor the levels.
Ensure Adequate Ventilation: Use exhaust fans in high-moisture areas like bathrooms and kitchens to reduce the risk of mold. Regularly airing out your home can also prevent mold spores from settling.
Fix Leaks Promptly: Address leaks as soon as they are detected. Persistent moisture from even small leaks can create ideal conditions for mold growth.
Clean and Disinfect: After drying the area, clean and disinfect all surfaces to kill mold spores that might have begun to grow. Non-porous materials can be cleaned with water and detergent. Porous materials may need professional cleaning or replacement.
Importance of Timely Repairs to Protect Home Integrity: Prompt repairs not only prevent water damage and mold but also protect the structural integrity and value of your home. Delayed repair can lead to more severe problems, such as:
Foundation Damage: Water can weaken foundations, leading to costly repairs.
Increased Repair Costs: The longer a leak continues, the more extensive the damage can become, increasing the overall repair costs.
Health Risks: Mold and mildew can pose health risks, particularly for those with allergies or respiratory issues.


